WFH Revolution
Welcome, dear readers, to a brand new year of innovation and inspiration from the WFH Revolution!
As we dive headfirst into 2023, many of us are still finding ourselves working from home, spending countless hours staring at the same walls day in and day out.
But fear not, because we’ve got just the thing to spruce up your space and give you a little boost of creativity.
With this carefully curated list of 5 easy DIY projects, we’re here to help you inject some new life into your living space, without having to shell out big bucks or hire a team of experts.

Whether you’re a remote worker in need of a change of scenery, a parent looking to entertain your little ones, or simply a creative soul seeking a new challenge, we’ve got you covered.
So put on your DIY hat, grab your hammer and nails, and let’s make 2023 the year of home transformation!
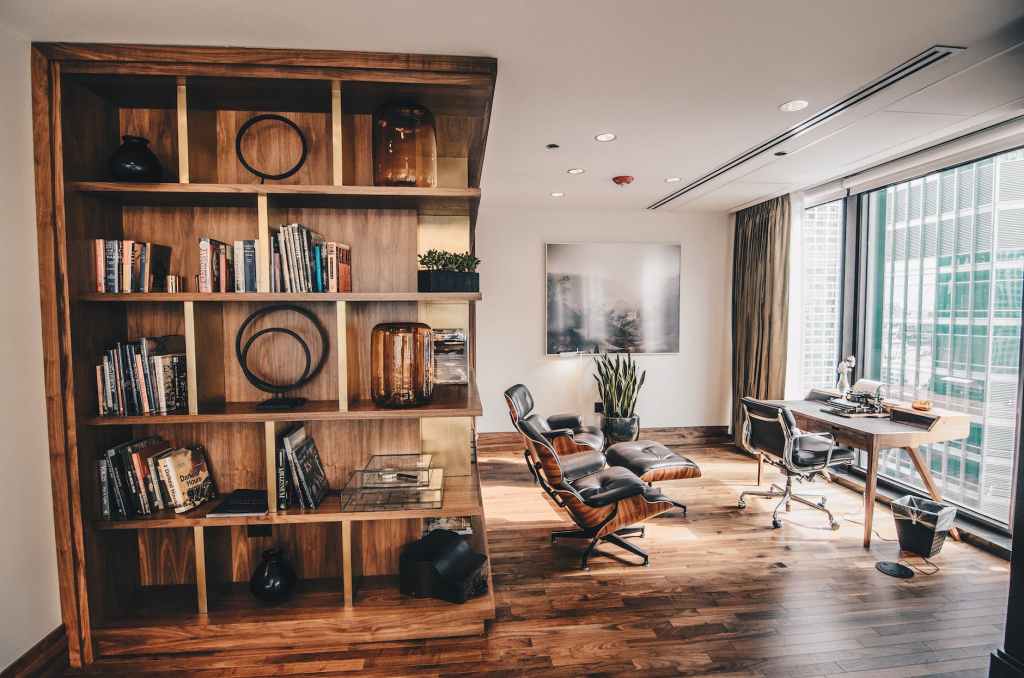
DIY Plant Wall: Transform Your Space with Greenery

It’s no secret that indoor plant walls have taken the world by storm, with countless home decor enthusiasts embracing the beauty and benefits of these lush green installations.
Not only do they add an undeniable touch of natural elegance to any space, but they’re also great for improving air quality and reducing stress levels – two things that are especially important for those of us who are spending more time than ever working from home.
If you’re ready to transform your space with your very own DIY plant wall, we’ve got just the guide for you.
Follow these simple steps and expert tips to create a beautiful, thriving indoor garden that will make your home the envy of all your friends.
Step 1: Plan Your Space and Materials
Before you start, make sure you have a clear idea of where you want to place your plant wall, and what materials you’ll need to create it. You’ll want to choose a spot that gets plenty of natural light, and that won’t be in the way of foot traffic or furniture. As for materials, you’ll need a sturdy wall, a variety of plants and pots, as well as hooks or brackets to hold everything in place.
Step 2: Select Your Plants
This is where the fun really begins. When choosing your plants, make sure to select a variety of species with different textures, colors, and growth patterns. You’ll also want to choose plants that thrive in the same conditions – for example, if your wall gets a lot of direct sunlight, choose plants that love the sun. If you’re not sure where to start, consider getting advice from a local nursery or online plant retailer.
Step 3: Plan Your Layout
Before you start attaching your plants to the wall, you’ll want to plan out the layout of your garden. Consider using a mix of large and small plants, and experiment with different arrangements until you find the perfect look. You can also use a pencil to mark out where you want each plant to go before you start hanging them up.
Step 4: Hang Your Plants
Using hooks or brackets, hang each plant pot on the wall in its designated spot. Make sure to secure them firmly so that they don’t fall or shift over time. Depending on the size and weight of your pots, you may need to use several hooks to keep them secure.
Step 5: Maintain Your Garden
To ensure the longevity and health of your plant wall, you’ll need to take good care of it. Make sure to water your plants regularly and fertilize them as needed. You’ll also want to monitor their growth and adjust their positioning as necessary. Be sure to follow the specific care instructions for each plant species you choose.
Recommended Products:
Variety of Indoor Plants (e.g. Pothos, Spider Plant, Snake Plant)
Pots of Various Sizes (e.g. Terracotta, Ceramic, Hanging)
Expert Tips:
- Choose plants that are appropriate for the amount of light and humidity in your space.
- Use a moisture meter to monitor the soil moisture level and ensure proper watering.
- Group plants with similar water and light needs together to make maintenance easier.
- Prune regularly to keep your plant wall looking neat and tidy.
With these simple steps and tips, you’ll be well on your way to creating a stunning indoor plant wall that will add beauty and serenity to your home office, living room, or any other space in need of a little greenery.
Start planning your plant wall today and enjoy the benefits of a natural oasis in your own home!
Upcycled Furniture: Give Old Pieces a Fresh Start

Are you tired of your old furniture but don’t want to break the bank by buying new pieces?
Upcycling old furniture is a fun and eco-friendly way to give your living space a fresh new look.
Not only does it save you money, but it also reduces waste and is a creative way to repurpose items that may have otherwise ended up in a landfill.
In this section, we’ll walk you through a step-by-step tutorial on how to refurbish an old wooden dresser with new paint and hardware.
We’ll also provide you with some recommended products for sanding, painting, and accessorizing your furniture.
Plus, we’ll share some tips on how to find free or low-cost furniture to upcycle.
So get ready to grab some paintbrushes and sandpaper, and let’s get started!
Before we dive into the tutorial, let’s talk about why upcycling furniture is a great option.
First, it’s a more sustainable way to decorate your home.
Instead of throwing away old furniture, you’re giving it a new life, which reduces waste and is better for the environment.
Second, it’s a creative way to express yourself and add your own personal touch to your living space.
And lastly, it can save you money.
Buying new furniture can be expensive, but upcycling old pieces can be a cost-effective way to update your decor.
Refurbishing a Wooden Dresser:
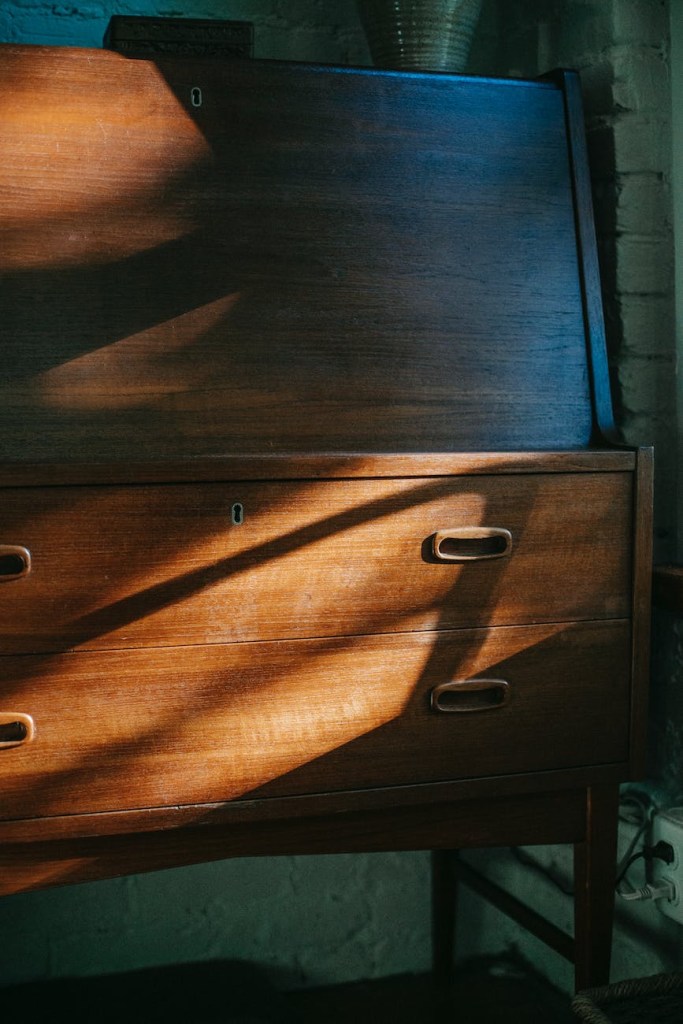
- To start, you’ll need a wooden dresser that you want to upcycle, sandpaper, paint, paintbrushes, new hardware, and a screwdriver.
- First, remove the hardware and sand down the dresser to create a smooth surface. Wipe it down with a damp cloth to remove any dust or debris.
- Then, choose a paint color that fits your style and apply it to the dresser with a paintbrush. Allow the paint to dry completely before applying a second coat.
- Once the second coat is dry, add new hardware to give the dresser a modern and updated look.
Recommended Products:
- For sanding, we recommend using a fine-grit sandpaper, such as 220 grit.
- For painting, we suggest using a water-based, low-VOC paint, which is better for the environment and your health.
- For hardware, consider purchasing modern and sleek options that fit your personal style.
Tips for Finding Free or Low-Cost Furniture to Upcycle: One great way to find free or low-cost furniture is to check online classifieds, such as Craigslist or Facebook Marketplace.
You can also check your local thrift stores or garage sales for hidden gems.
Don’t be afraid to get creative and see the potential in old pieces that may need a little TLC.
You’ll be amazed at how a little paint and new hardware can transform an old piece into something fresh and modern.
So, get ready to roll up your sleeves and give your old furniture a new life with a little bit of creativity and some elbow grease.
Happy upcycling!
Smart Home Upgrades: Make Your Space Tech-Savvy

Welcome to the future!
The latest advancements in technology have made it possible for us to control our homes with just a few taps on our phones.
From smart thermostats to voice-activated assistants, there are countless ways to upgrade your living space with the latest tech gadgets.
In this section, we’ll guide you through the process of transforming your home into a smart home, step by step.
First things first, you’ll need to set up a smart home hub.
This is the central device that will allow you to control all your smart devices from one place.
We recommend the Amazon Echo or Google Nest Hub as both are highly rated and have a range of features.
Once you’ve set up your hub, it’s time to integrate your other devices.
Start with basic devices like smart light bulbs and a smart thermostat.
From there, you can add more advanced devices like a robot vacuum, smart locks, and even a smart fridge.
Recommended Products:
When it comes to creating a smart home network, there are a lot of products to choose from.
Here are some of our top Smart Home picks:
Amazon Echo (or Google Nest Hub)
Here are some expert tips for making the most of your smart home upgrades:
- Use smart plugs to control the power usage of non-smart devices
- Use smart sensors to monitor your home’s energy consumption
- Use smart locks and cameras to enhance the security of your home
- Keep your smart devices up to date with the latest software updates
- Connect your smart home devices to a virtual private network (VPN) for added security.
With these tips and products, you can transform your home into a tech-savvy oasis that’s both convenient and secure.
Cozy Textiles: Add Warmth and Comfort to Your Space

As the temperature drops outside, there’s nothing quite like snuggling up with a warm and cozy blanket inside.
But why settle for a store-bought throw when you can make your own?
In this section, we’ll explore the power of textiles to transform a room and provide a step-by-step guide for making your own chunky knit throw blanket.
From pillows and rugs to curtains and blankets, textiles have the power to add texture, color, and warmth to any living space.
Whether you prefer a minimalist or bohemian aesthetic, incorporating cozy textiles into your decor can create a cozy and inviting atmosphere.
For those chilly nights when you want to snuggle up on the couch, a chunky knit throw is the perfect accessory.
And the best part?
You can easily make one yourself! Our step-by-step guide will take you through the process, from selecting the right yarn to creating the perfect stitch.
If you’re new to knitting or crocheting, it can be overwhelming to navigate the world of yarns, needles, and hooks.
That’s why we’ve curated a list of recommended products to get you started on your textile-making journey.
From beginner-friendly tools to high-quality yarns, we’ve got you covered.
When it comes to selecting fabrics and patterns for your cozy textiles project, there are a few things to keep in mind.
First and foremost, consider the overall aesthetic and color scheme of your space.
If you have a neutral color palette, you might want to opt for a bold, patterned fabric to add a pop of interest.
On the other hand, if your space is already full of colors and patterns, you may want to go for a more understated fabric or texture to balance things out.
Additionally, think about the purpose of the textile you’re creating.
If you’re making a throw blanket for your living room, you might want to choose a soft and warm fabric like wool or cashmere.
If you’re making pillow covers for your bedroom, you might opt for a silky or satin fabric for a more luxurious feel.
Finally, don’t be afraid to mix and match patterns and textures for a layered, eclectic look.
You could pair a chunky knit blanket with a printed throw pillow, or a silky pillowcase with a faux fur throw.
The key is to experiment and have fun with it!
Making your own chunky knit throw blanket is a fun and easy way to add a cozy touch to your space.
Follow these step-by-step instructions to create your own:
- Gather your materials. You’ll need super bulky yarn and large knitting needles. The size of the needles will depend on the yarn you choose, but typically you’ll want needles that are at least 25mm in diameter.
- Cast on your stitches. Depending on the size of your blanket, you’ll need to cast on a certain number of stitches. A good rule of thumb is to cast on enough stitches to make the width of the blanket about 1.5 times the width of your knitting needles.
- Knit the first row. Start knitting the first row of stitches, making sure to keep your tension loose so the stitches don’t become too tight.
- Continue knitting. Keep knitting back and forth in rows until your blanket is the desired length. You can choose to make your blanket as long or as short as you like.
- Bind off your stitches. When you’re ready to finish your blanket, bind off the stitches and weave in the ends of the yarn.
- Fluff and enjoy! Once your blanket is complete, give it a good shake and fluff to make sure it’s nice and cozy. Then drape it over your couch or bed to add some warmth and texture to your space.
As we continue to adapt to the changing landscape of remote work and spending more time at home, it’s more important than ever to make our living spaces a reflection of our personalities and needs.
These DIY projects provide an opportunity to add a personal touch to your space and make it a place where you feel comfortable, inspired, and productive.

We hope this list has sparked your creativity and given you the confidence to embark on your own home makeover journey.
Here’s to a year of crafting, creating, and transforming our homes into sanctuaries of comfort and joy.
Happy DIY-ing!
Thank you for taking the time to read our guide on 5 easy DIY projects to spruce up your living space in 2023.
We hope you found it inspiring and helpful.
We would love to hear from you about your own DIY projects, tips, and ideas. Please leave a comment below and share this guide with your friends and family.
And don’t forget to subscribe to our newsletter for more exciting content and exclusive DIY project ideas.
Let’s create the ultimate DIY community together!
Join a Community
Looking for a sense of community as you navigate the world of work-from-home jobs? Join the millions of people who have already made the switch to remote work. Through the rise of technology and the COVID-19 pandemic, working from home has become the new normal. By joining this community, you’ll gain access to a network of like-minded individuals who can provide support, advice, and inspiration as you pursue your career goals. Don’t wait – join the community of a million people working from home.

Leave a comment